DIY Morse Code Bracelet Instructions
A Morse Code bracelet is a fun and unique way to honor your loved one.
You can get as creative as you want here. These are just base instructions, but feel free to take it in the direction that means the most to you. Feel free to download and print the pdf version!
What you’ll need:
- 4 colors of glass beads (any size, but a little bigger tends to be easier, at least 2mm-3mm). You can use other types of beads too but the bigger the bead, the longer the bracelet. If you’re doing a single name or something similar, this may still work ok.
- Clear stretchy bracelet cord (making sure it’s sized right to fit through the bead hole). It’s just my preference to use stretchy cord because it’s easy. You can use/create any type of bracelet you choose.
- Optional…small dab of superglue for the knot
Step 1: Decide what word or words you want and go to a Morse Code Translator to get the proper translation. It’s very helpful to print out the translation and be sure you understand it.
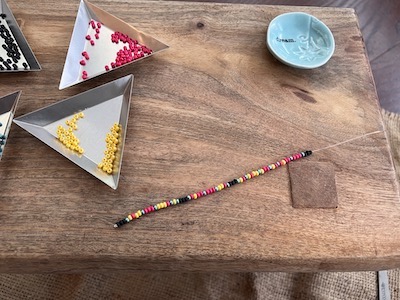
In the example below, for the phrase I choose, there are three words, with a / between each word. Each word is made up of dots and dashes. (I used a very short phrase for this tutorial and the bracelet is super small. You’ll want to use a longer phrase or cushion it with base color beads).
Step 2: Gather Your Supplies and Prep. Having everything out and organized will be very helpful in this project. You’ll need four colors: a base color, spacer color, dot color and dash color.
On the printed message, write what each color represents, so you don’t forget.
Write down on your paper what each color represents, so you don’t forget.
Step 3: Tie a placement knot in one end and thread on a few base color beads (I used 3 base to start). Next, place one spacer (as the start of the first word). Now you’ll begin your first word translation.
Step 4: Use your dot and dash colors for the letters, with one spacer color in between each letter, and after the last letter. Once your first word is done, use a few base color beads before the next word (keep this uniform, 2 or 3 base beads).
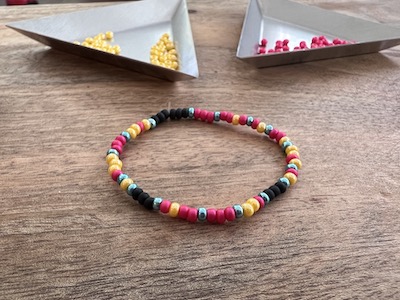
Step 5: Repeat for all your words. Once you’re words or phrase are done, you can add base color beads to make it all even and the size you need.
Double or even triple knot the cord – make it tight but careful not to break it! (I like to use stretchy cord because it’s just easy, but you do you!) You could put your tiny dot of glue on the knot if you feel like you need to. I typically just trust the knot and don’t use glue.
And you’re done! I’ve done some where the phrase is long so I end up with a double layer bracelet. Do whatever works for you! A little planning in the beginning and you’ll have an easy project with a lot of meaning.
in Morse Code